Sunday, July 15, 2018

T5 vs T4 vs T3 vs T2 vs T1

A lot of players think that a higher Tier of troops in Brutal Age is always better. That is most likely not the case! Please see below various points from my analysis / research which can give you more ideas about using T1, T2, T3, T4, T5 in a smarter way.

#1 Troop Strength

Brutal Age is most probably based on other games which were very similar to it which came before. My research shows that based on those cases the higher Tier troops are not that much stronger!

Players confuse Strength with Power. Power is not Strength!
Power is the total score of your "kingdom" and all things (buildings, army, research, etc) contribute Power to your TOTAL Power number on top. Higher Tier army units contribute more Power.

While the Power contribution of troops increases from T1 to T5, their strength does not go up in the same way. Actually it's more like this:

  • Tier 2 is 2 times stronger than Tier 1. This is the easy part. 
  • Tier 3 is 3 times stronger than Tier 1 or only 50% stronger than Tier 2.
  • Tier 4 is about 4.5 times stronger than T1 or also 50% stronger than T3
  • And T5 is probably also 50% stronger than T4 although might be double because it is very hard to get T5 - more confirmation is needed.
  • Note: this is not 100% guaranteed data but comes from research / testing as explained above.

When you are attacking:

Then you definitely want to have a high Tier army units, but this is only because March size is limited, so we want to try to put as much power inside that limited space as possible. 

When you are defending:

This is when you want the lower Tier units, because you can train a lot more lower Tier than the attacker can train higher Tier. So the defender has the advantage!

For example if the attacker is coming with 100,000 Tier 3, then with the same time/resources the defender can train 200,000 Tier 2 units, which will be a lot stronger than the attacker whose 100k T3 is equivalent to 150k T2 for this calculation, so the defender will have a 50k unit advantage and win!


The hospital problem:

The problem with lower Tier units is the hospital space. You will never have enough space for such a big army so if the attackers are stronger then a lot of units will die. However, when you have massive armies then most units will die anyways. Hospital space can never catch up with total army size if you are playing well / correctly.

#2 Troop Load

Tier 1 Warrior has the best troop load = 13 Load. That's massive compared to even high Tier units. For example, the T2 of the same type, the Protector, has 10 load, but it takes 2 times more time to train and costs more resources. So you can train A LOT of T1 Warriors cheaply and get a HUGE amount of load to gather resources.


T1 units are also very useful when recovering from total destruction! They can be healed instantly and allow you to quickly gather resources to help you recover. And once you grow back to your maximum hospital capacity you can both farm more resources and restart training stronger units.

#3 Risks and Farming in the open

Lastly, sometimes players have to gather resources outside their color area - the open / dangerous space. If there is an attack on your gatherers in the open they will all die. So it is very good to have some T1s to use for this purpose because I have seen people lose T3s and T4s out in the open which is a total waste of units.

Conclusion

  • T1s or even T2s can do a lot and serve many purposes and if they die it is not the end of the world.
  • I think players should have various Tier units to use for various purposes.
  • The best units should be used for attacking mixed with some lower Tier units as sacrifice if there must be losses.
  • The lowest Tier can gather resources in large amounts or help defend your outposts if you get attacked.


Tuesday, July 3, 2018

Brutal Age SKILL EFFECTS Explanations

Heya! I was wondering what some skill effects in Brutal Age really do so I was doing some research and found the info below from tap4fun helpdesk. So below you can see for your Partners what their skills do:

Skill Effects / Buffs / Debuffs

Note:
  • Buff = a term for a skill effect which is giving a beneficial power up or improvement
  • Debuff = a term for a skill effect for weakening or impairing enemies
Let's start with less clear skills (which are perhaps not well enough explained in the game):
  • CR Res Enhance: Reduce the chance of suffering CR by 50% (basically protection against critical attacks on your Partner)
  • Unyielding: HP just won't be lower than 1 when being attacked.
  • Protection: The target is protected by a teammate from any damage and the teammate takes 50% of the damage.
  • Blind: It has a 50% chance to deflect the hit, which will reduce 30% of the dealing damage.
  • Thor Curse: After the countdown, deal damage (Ignoring DEF)
  • Healing Forbidden: Can't recover HP (this is basically preventing your enemy from healing, which is especially useful for healer bosses or any enemy that has health steal, health recovery or other healing skills)
  • Silence: Cannot use skills with CD (this make a similar effect like Taunt, so just the simple skills, usually first one, can be used).
  • Poison: Each round deal damage by 5% of the max HP. (adding it here since it is not explained in the game)
Example: Black Shaman Heating Soul Blind skill effect:

Stats Related Skill Effects

These are simple skill effects modifying stats:
  • ATK Enhance: Increase ATK by 50%
  • DEF Enhance: Increase DEF by 70%
  • Speed Enhance: Increase Speed by 30%
  • ATK Reduce: Reduce ATK by 50%
  • DEF Reduce: Reduce DEF by 70%
  • Slow: Reduce Speed by 30%
  • CR Rate Enhance: Increase CR Rate by 30%
  • Enduring Healing: Recover 15% of max HP in each round
  • Injury: Receive additional damage by 25%

Strategic Skill Effects

  • Add Counter Blessing: It can fight back with 75% ATK after being attacked
  • Immunity: Immune to any debuff (it won't dispel the debuffs which are taking effect)
  • Invincibility: In this status, you won't suffer any damage
  • Damage Reflect: Reflect 30% of received damage
  • Add Shield: Add a shield which can absorb a certain amount of damage
  • Nirvana: Revive immediately to its 30% HP after being defeated
  • Energy Shield: Cast shields for the team
  • Inertia: Cannot get buffs
  • Taunt: Can only use the first skill to attack the taunter.
  • Sleep: Enter Sleep status, and cannot take actions until attacked.
  • Frozen: Enter Frozen status, and cannot take actions
  • Stun: Enter Stun status, and cannot take actions
  • Amnesia: Cannot trigger the passive skill
 Example: Double Blade Girl Sleeping Dagger skill effect:

Sunday, July 1, 2018

War Pattern Recommendations per Partner

Hi everyone! I found a nice Brutal Age document for War Pattern sets recommended for each different Partner type which I am sharing with you here. I believe the document was prepared in collaboration by a number of people and as I do not know who they are I will just say thanks to them on behalf of everyone and this is the link to the original doc.

OK, here we go with the info:

First 1 quick paragraph on the basics and reading guidelines:

Armour Stat Information

Each piece of Armour has possible main stats that it can have on it. Here is a list of the possible stats that each piece of Armour can have on it. The red bold stats are stats that are exclusive to that Armour piece.
  • Helmet - Possible Stats: ATK, HP, DEF, %ATK, %HP, %DEF, %CR, %CRD
  • Left Hand - Possible Stats: SPD, ATK, HP, DEF, %ATK, %HP, %DEF
  • Right Hand - Possible Stats: ATK, HP, DEF, %ATK, %HP, %DEF, %RES, %HIT
  • Chest - Possible Stats: ATK
  • Left Foot - Possible Stats: DEF
  • Right Foot - Possible Stats: HP
In the text below under “Partner Information” it will say what to use as the main 3 stats.
Example: “3 HP% Main Stats” it is referring  to the Helmet, Left hand and Right hand.

Partners in each section are put in order from what is considered to be the strongest to considered to be the weakest according to color.

Example:

Demon Killer

  • Green (Wild) - 3 sets of Hippo with 3 HP% main stats or 1 set of Cat and 1 set of Hippo with 3 HP% main stats.
  • Blue (Wise) - 1 set of Smilodon and 1 set of Hippo with three ATK% main stats.
  • Red (Brave) 1 set of Smilodon and 1 set of Hippo or 1 set of Smilodon and 1 set of Wolf with three ATK% main stats.
The green variant of the Demon Killer is considered the strongest, therefore it is placed on the top of the list, followed by blue and then red.

Partner Information

(Only partners 3 stars and up are listed as 1 and 2 star partners should only be used to enhance other partners)

Berserker

  • Blue (Wise) - 3 sets of Hippo with three HP% main stats.
  • Red (Brave) - 1 set of Smilodon and one set of Hippo.
  • Green (Wild) - Not a strong partner, only use if you have no other option available.

Bird Shaman (arguably the worst 3 star in the game, do not use)

  • Blue (Wise) - Not a strong partner, only use if you have no other option.
  • Green (Wild) - Not a strong partner, only use if you have no other option.
  • Red (Brave) - Not a strong partner, only use if you have no other option.

Black Shaman

  • Blue (Wise) - 1 set of Cat and 1 set of Corsac with SPD main stats where possible, and %HP main stats anywhere SPD is not possible.
  • Green (Wild) - 3 sets of Wolf with three ATK% main stats.
  • Red (Brave) - Not a strong partner, only use if you have no other option available.

Blonde Beauty

  • Red (Brave) - 1 set of Smilodon and 1 set of Hippo or 1 set of Smilodon and 1 set of Wolf with three ATK% main stats.
  • Blue (Wise) - 3 sets of Hippo with 3 HP% main stats.
  • Green (Wild) - 3 sets of Hippo with 3 HP% main stats.

Boar

  • Blue (Wise) - 3 sets of Bull with three DEF% main stats.
  • Red (Brave) - 3 sets of Bull with three DEF% main stats.
  • Green (Wild) 3 sets of Bull with three DEF% main stats.

Bonefist

  • Green (Wild) - 1 set of Cat and 1 set of Hippo with SPD main stats where possible and HP% main stats anywhere SPD is not possible.
  • Blue (Wise) - Not a strong partner, only use if you have no other option available.
  • Red (Brave) - Not a strong partner, only use if you have no other option available.

Colonel

  • Green (Wild) - 3 sets of Bull with 3 DEF% main stats.
  • Blue (Wise) - 3 sets of Bull with 3 DEF% main stats.
  • Red (Brave) - 3 sets of Bull with 3 DEF% main stats.

Demon Killer

  • Green (Wild) - 3 sets of Hippo with 3 HP% main stats or 1 set of Cat and one set of Hippo with 3 HP% main stats.
  • Blue (Wise) - 1 set of Smilodon and 1 set of Hippo with 3 ATK% main stats.
  • Red (Brave) - 1 set of Smilodon and 1 set of Hippo or 1 set of Smilodon 1 set of Wolf with 3 ATK% main stats.

Double-Blade Girl

  • Green (Wild) - 1 set of Smilodon and 1 set of Hippo (recommended) or 1 set of Smilodon 1 set of Wolf with  SPD main stats where possible, and %ATK main stats anywhere SPD is not possible.
  • Blue (Wise) - 1 set of Smilodon and 1 set of Hippo (recommended) or 1 set of Smilodon 1 set of Wolf with SPD main stats where possible, and %ATK main stats anywhere SPD is not possible.
  • Red (Brave) - 1 set of Smilodon and 1 set of Hippo (recommended) or 1 set of Smilodon 1 set of Wolf with  SPD main stats where possible, and %ATK main stats anywhere SPD is not possible.

Dragonman

  • Green (Wild) - 1 set of Cat and 1 set of Bull with speed on the left hand and 2 DEF% main stats.
  • Blue (Wise) - Not a strong partner, only use if you have no other option available.
  • Red (Brave) - Not a strong partner, only use if you have no other option available.

Drum Beater

  • Red (Brave) - 3 sets of hippo with 3 %HP main stats
  • Blue (Wise) -
  • Green (Wild) -

Fierce Beast

  • Green (Wild) - 3 sets of Hippo with 3 HP% main stats.
  • Red (Brave) - 3 sets of Hippo with 2 HP% and 1 HIT% or 3 HP% main stats
  • Blue (Wise) - Not a strong partner, only use if you have no other option available.

God of Earth

  • Blue (Wise) - 3 sets of Bull with 3 DEF% main stats
  • Red (Brave) - 1 set of Smilodon and 1 set of Corsac with 3 ATK% main stats 
  • Green (Wild) - 1 set of Smilodon with 3 %ATK main stats and 1 set of Hippo.

Guitarist 

  • Red (Brave) - 1 set of Cat and 1 set of Bull or 3 sets of hippo both with SPD on the left hand and 2 DEF% main stats 
  • Blue (Wise) - 3 sets of Hippo with 3 HP% main stats
  • Green (Wild) -

Little Flower

  • Green (Wild) - 3 sets of hippo with either 2 %HP and 1 %HIT (recommended) or 3 %HP main stats or 2 sets of hippo and 1 set of corsac with 3 %HP main stats
  • Red (Brave) - 3 sets of hippo with either 2 %HP and 1 %HIT (recommended) or 3 %HP main stats or 2 sets of hippo and 1 set of corsac with 3 %HP main stats
  • Blue (Wise) - 3 sets of hippo with 3 %HP main stats

Long Face

  • Green (Wild) -
  • Blue (Wise) -
  • Red (Brave) -

Marksman 

  • Red (Brave) - 1 set of Smilodon and 1 set of Hippo or 1 set of Smilodon 1 set of Wolf with 3 ATK% main stats
  • Green (Wild) - 1 set of Smilodon and 1 set of Hippo or 1 set of Smilodon 1 set of Wolf with 3 ATK% main stats
  • Blue (Wise) - 1 set of Smilodon and 1 set of Hippo or 1 set of Smilodon 1 set of Wolf with 3 ATK% main stats

Mr. Dagger

  • Blue (Wise) - 1 set of Smilodon and 1 set of Hippo or 1 set of Smilodon 1 set of Wolf with 3 ATK% main stats
  • Red (Brave) - 
  • Green (Wild) - 1 set of Cat and 1 set of Hippo with SPD main stats where possible, and ATK% anywhere else.

Nomad King 

  • Blue (Wise) - 3 sets of Hippo with either 2 HP% and 1 ATK% or 3 HP% main stats
    (One of, if not THE strongest partner in the game)
  • Red (Brave) - 1 set of smilodon and 1 set of wolf or 1 set of smilodon and 1 set of hippo with HIT% main stats where possible and ATK% main stats anywhere HIT% is not possible
  • Green (Wild) -

Scarecrow (The WORST 4 star in the game, do not use) 

  • Blue (Wise) - Not a strong partner, only use if you have no other option available.
  • Green (Wild) - Not a strong partner, only use if you have no other option available.
  • Red (Brave) - Not a strong partner, only use if you have no other option available.

Wolf

  • Blue (Wise) - Not a strong partner, only use if you have no other option available.
  • Green (Wild) - Not a strong partner, only use if you have no other option available.
  • Red (Brave) - Not a strong partner, only use if you have no other option available.

Zyra

  • Blue (Wise) - Not a strong partner, only use if you have no other option available.
  • Green (Wild) - Not a strong partner, only use if you have no other option available.
  • Red (Brave) - Not a strong partner, only use if you have no other option available.

Tuesday, June 26, 2018

Brutal Age Totem War Guide

Hi everyone. This is a compilation post for Brutal Age Totem War Guide. I tried to find all information about it and put it together here to make it easy for people to learn everything.

Article Content:
All the pictures and some comments I am adding myself and the text:
  1. First is the guide I found on another blog and I am re-posting it here. This is the link to the original article I had found. 
  2. Second is the "Ancient Totem Description" as provided officially via FAQ by tap4fun support - here is the original link.

Totem War Guide

In this totem combat guide we hope to teach you all of the basics you will need to become a brutal age totem expert. The information on totem combat is broken into several sections below for your convience.

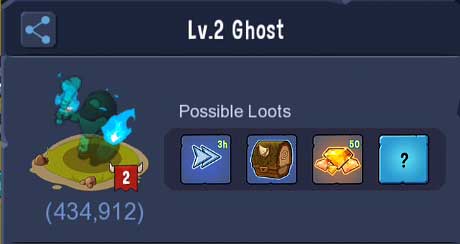
Killing the totem ghosts:

The strength of the totem ghosts will depend on how many stars the totem has and how many totems the clan owns. Each ghost will cost 20 stamina points to kill. You can attack the ghost as you would any other monster. One successful attack is all it takes to kill each ghost.

Killing tough totem ghosts:

As a clan acquires more totems the ghosts become increasingly difficult to kill. If the ground under the ghosts is not the same color as your horde you may lose troops as opposed to them being hospitalized. It is best to keep the ground tiled when killing tough ghosts to prevent losses. Eventually after enough totems are owned by the clan it will become very difficult for troops less than t4 to attack successfuly. When this point is reached many players will often leave their clan temporarily to kill the ghosts then return to capture the totem.

Once the final ghost is killed a 40 minute timer begins in which the totem must either be captured from another clan, or the serphent killed if the totem is currently unoccupied.

Killing the totem serpent:

Totem guardian serphents are the different from ghosts in that they require multiple attacks to slay. The totem serphents are also unable to be tiled so troop loss is possible. 1 star totem serphents are rather easy to kill and should only take a few people. Conversely 3 star totems will require several t4+ players to defeat. The serphents require 30 stamina per attack and can only be attacked once per 10 minutes.

Capturing totems:

Taking a totem from another clan does not require a serphent to be killed but may prove more dangerous. First all ghosts must be killed then the totem must be held for the entire countdown time. The more totems your clan owns the longer the capture time becomes so plan accordingly.

Holding totems:

Once your clan completes the occupation time after defeating the serphent, the totem is now yours and will gain a shield for 2 hours in which no one else may attempt to capture the totem. Once the shield expires it is not required to reinforce the totem with troops to hold the totem unless it is to prevent enemy players from capturing it.

How totem combat works:

Fighting for a totem is a little different than attacking an outpost. First totems are unable to be rallied and must be attacked solo. Second no troops will be hospitalized and any losses incurred will be deaths. Third, unlike outpost combat and Rallys where several players are counted as one group, those involved in totem fights are counted as 1 v 1 fights. This is a large advantage multiple totem defenders if their troops have similar strength to the attacker.

In order for the attacker to have attack success they must defeat each occupying player in the order the defenders entered the totem in. For example if player A attacks a totem occupied by players B, C, and D then player A must first defeat player B. After that the remaining troops of player A must defeat player C, and then again for D.

While totem battles may be dangerous, the rewards from the era daily and era achievement tasks can be quite lucrative.

Ancient Totem Description

There are many Ancient Totems on the map; Ancient Totems of different Star Ranks and types can provide different BUFFs. Players can fight together with Clan members to defeat the Ghosts around Ancient Totems, then kill Ancient Serpents to get BUFFs.

Ancient Totem BUFF Description

Ancient Totem of different types can provide BUFF for corresponding soldier type to all members in the Clan aftering being occupied.

Ancient Totems of higher Star Rank can provide better BUFFs.

All members in the Clan can enjoy additional resource production after occupying an Ancient Totem. Each occupation of an Ancient Totem can provide additional resource production once.

A random enchantment may be added to an Ancient Totem when it appears. Ancient Totems with the enchantment can provide additional BUFFs or special skills.

Ghost Description

If a Clan wishes to occupy an Ancient Totem, 8 Ghosts around the Ancient Totem must be defeated first. After that, the Plunder Period for the Ancient Totem begins. Players can enter the Ancient Totem to attack Ancient Serpents. After defeating an Ancient Serpent, players can occupy the Ancient Totem.

Ghosts can be defeated but can’t be consumed. If a player can’t defeat a Ghost with one attack, then the Ghost will fully recover.

Ancient Serpents won’t recover during the Plunder Period, but it will be full recovered when the Ancient Totem enters its Protection Period.

Ancient Serpent Description

Players can attack Ancient Serpents during Ancient Totem Plunder Periods. It’s a BOSS battle, and each attack can deal a certain amount of damage to the Ancient Serpent. After an attack the Ancient Serpent won’t recover and players will receive a victory BOSS battle report.

Players can launch another attack after 10 minutes since the last attack on the Ancient Serpent.
A player can try to occupy any Ancient Totem if its Clan has no occupation of the Ancient Totem. Otherwise, the player can only try to occupy Ancient Totems near the occupied one.

Players can attack Ghosts and Ancient Serpents directly but can’t rally attack them.

When a player is trying to occupy an Ancient Totem, its Clan members can send reinforcements to the Ancient Totem and players from other Clans can also attack the Ancient Totem.

Protection Period Description

When there are still undefeated Ghosts at the Ancient Totem, the Protection Period will still be in efffect. Players can’t attack Ancient Serpents during Protection Period.


Plunder Period Description

Plunder Period for the Ancient Totem begins after all Ghosts around it have been defeated. Players can attack Ancient Serpents during the Plunder Period. Meanwhile, the countdown will be activated.
The countdown: When an Ancient Totem enters its Plunder Period and no players are occupying it, then the countdown will start and it won’t pause until a player is occupying the Ancient Totem. The Plunder Period will come to an end when the countdown is over, at the same time, Ghosts will appear again, the Ancient Serpent will recover and the Ancient Totem will return to its Protection Period.

Peace Period Description

The Ancient Totem will get a Peace Shield for 3 hours after being occupied by players. No Ghosts or Ancient Serpents can be attacked during the Peace Period.

Era Description

Each Era will last for a period of time. When an Era comes to an end, Clans will be rewarded based on the amount of occupied Ancient Totems. Then, the locations of and BUFFs for the Ancient Totems will be reset.

Each Era will begin with a series of daily events. Players can get abundant rewards from the events.

Each Era marks a new beginning. If your Clan hasn’t made great achievements during this Era, don’t worry! You can recruit more Clan members and try your best in the next Era.

Thursday, June 21, 2018

Brutal Age PARTNERS Guide

I found this nice guide by Hnoo1 on Reddit and decided to share here for everyone. I'll try to add more pictures and info where I can to further enhance this guide.

Partners Guide : Part 1 - Basics

Introduction:

Hi, my name is mohanad AKA Hnoo in server 323 , Partners or you might call them heroes is the most thing interest me in Brutal Age so i started to look everywhere to know more about them but i couldn't find anything so i decided to make this guide, I hope you enjoy it ^_^

So, what are partners? What they can do for me?

Well , partners will act like leaders for your troops giving them Moral if they survive the battle which will increase troops ATK, DEF and HP based on their legion skill, once your Stronghold reach level 6, partners will be unlocked and you will start with Red Berserker and Blue Blonde Beauty.


OK, you got your partners now but what all those numbers mean ? "stats"


Partner Attribute: there is 3 attribute for partners which is Brave (red), Wise (Blue) and Wild (Green)

Color rules: Red > Green > Blue > Red 

Stars: determine your partner starting stats and stats growth, 6 stars is the max rank your partners can reach 

Battle Skills: each partner has his own unique set of skills which i will try to explain it in part 4 of this guide

First battle skill doesn't have cooldown while 2nd and 3rd skills have it. The cooldown regulates how frequently you can use a skill.


Leader skill is a unique skill which will increase your partners team certain stat by %

Legion skill: provide moral boost to your troops based on natural stars of your partners if they survive the battle


LV: shows your partner current level and max level
  • Level 1 partner max Level 15
  • Level 2 max Level 20
  • Level 3 max Level 25
  • Level 4 max Level 30
  • Level 5 max Level 35
  • Level 6 max Level 40
Partner Type: there is 3 types of partners ( ATTACK , DEFENSE , SUPPORT)
  • ATK partners act as your main damage dealers in your team
  • DEF partners act as Tanks to absorb damage
  • SUPPORT partners offers support to your team ( Healing and buffing mainly )
HP: the amount of health your partner have ( enemy tend to attack the lowest HP partner in your team first )

ATK: How much damage your partner can deal to enemy

DEF: reduce damage taken by enemy

SPD: Determine who will take action first and how fast action bar refill * SPD is the most important stat because partners with high SPD can take their turn faster and might attack twice before the enemy take their turn.

CR: critical rate determine the chance of landing a critical hit, always start at 15%

CRD: critical rate damage which is ( ATK * CRD/100 + ATK) , always start at 50%

RES: resistance chance to enemy skills

HIT: determine the chance your skills will effect the enemy *SPD, CR , CRD , RES and HIT stats can only be increased by patterns or leader skills ( and awaken for few partners)

How to get partners ?

Mainly there is 3 ways to get them :
  1. Adventure.
  2. Turtles.
  3. Partners shards from lonely warrior or crafted at Old Bald Smithy .

Partners Guide : Part 2 - Enhance, Evolve and Awakening.

So, after few adventures and spinning turtles you have few partners now but they are weak so whats next ? First of all you need to choose 4 partners as your main focus for evolving and leveling

Good 3 stars choices:
  • Red Blonde Beauty
  • Blue Berserker
  • and Blue Boar 
  • Upgrade the level of a Partner AKA Enhance 
  • Upgrade the star of a Partner AKA Evolve

Enhance:

Enhance is the way to use all those 1 star and 2 stars useless partners to increase partner EXP (using 3 stars or higher partners as Enhance material is NOT recommended). Using the same partner as enhance material will increase partner skill by 1 level. (not recommended unless your partner is 6 stars max level already ).

* the more stars and level your enhance material has the more exp your partner get
* max level material is not enough to make your partner max level even if they have the same rank

Evolve:

Evolving a partner increase his base stats ( HP, DEF and ATK) to be able to survive longer and deal more damage. To evolve a partner it needs to be at max level and require partners of the same rank (level doesn't matter for evolve materials)
  • 5 stars partners need 5 partners rank 5
  • 4 stars partners need 4 partners rank 4
  • 3 stars partners need 3 partners rank 3 
  • 2 stars partners need 2 partners rank 2

So what does that mean?

If you are planing to evolve 5 stars partners to 6 stars you need:
  • 5 x 5 stars or 25 x 4 stars or 100 x 3 stars partners
which means if you want to evolve 5 stars partner starting from 3 stars partners you need to max level 25 rank 3 partners to evolve them to rank 4 then max level 5 rank 4 partners to evolve them to rank 5, so you better save all those 3 stars partners!

Awakening

The more you awaken your partner the more benefits it gets like increasing base stat by %. Unlocking skills or replacing a skill with a new powerful one with the same level or you can change their appearance after the 3rd awakening.

Awakening materials can be acquired from defeating lonely warriors. Note: certain awakening stars require another partners as material (Green god of earth require Blue Marksman as material for example).

Tips

  • 5 and 4 Star partners are hard to get, so keep them until you are sure you don't need them anymore
  • To level up your partner skill you should evolve it by using the same partner (color doesn't matter)
  • Leveling a skill by enhancing is not recommended
  • Don't level up 5 star partners skills, use catfish instead of wasting a rare partner for 1 skill level! (catfish can be farmed from lonely warrior).
  • Save all the material you get from lonely warrior until more partners awakening unlocked don't waste them now on weak partners!
  • Try to increase your main partner by adventuring only and enhance 3 Star partners you are planning on using them as Evolve materials.

Partners Guide : Part 3 - Patterns

We talked about how to evolve, enhance and awaken partners, now it's time for Patterns, the most important thing witch can make your partner powerful or useless , i hope you are ready for this ^_^ 

What are Patterns?

Patterns, stones, armor or tattoos (depends on how the game translates it for you) are pieces you can equip it to your partners to give them more stats, which can be found in adventure or pattern boxes.

Patterns Sets:

There are 10 types of patterns, each type can Buff your partner certain stat ONLY if you completed a set.
  • 2 Hippo: increase HP by 15\%- can be farmed at Riverside
  • 4 Smilodon: increase ATK by 35\%- can be farmed at Mount
  • 2 Wolf: increase CR by 12\%- can be farmed at Plain
  • 2 Bull: increase DEF by 15\%- can be farmed at Ice Lake
  • 4 Badger: increase CRD by 40\%- can be farmed at Forest
  • 4 Cat: increase SPD by 35\%- can be farmed at Anc. Battlefield
  • 2 Corsac: increase HIT by 20\%- can be farmed at Seaside
  • 2 Rabbit: increase RES by 20\%- can be farmed at Cave
Important note: Sets effect can stack for example [ 2 corsac = 20\% HIT , 4 corsac = 40\% HIT , 6 corsac = 60\% ]

Patterns stars :

There is 5 ranks of patterns you can have which are:
  • 1 Star, 2 Star, 3 Star and 4 Star patterns can be farmed at normal and difficult adventure level difficulties (don't level it up just sell it for souls; maybe only consider using 4 Star ones)
  • 5 Star patterns can only be farmed at adventure purgatory difficulty levels
  • 5 Star patterns offer the highest basic stat and stat growth per level (try to fully equip your partners using 5 stars only in the long term (in the short term just wear anything decent just to help you win the first purgatory level)

Patterns Colors (rarities):

Patterns have 5 colors based on how many Sub-Stats it has
  • White Pattern (common) : 0 Sub-Stat (level 0-2)
  • Green Pattern (magic) : 1 Sub-Stat (level 3-5)
  • Blue Pattern (rare) : 2 Sub-Stats (level 6-8)
  • Orange Pattern (ancient) : 3 Sub-Stats (level 9-11)
  • Purple Pattern (legendary) : 4 Sub-Stats (level 12-14 ) and 5 Sub-Stats on max level

Sometimes you get green or blue level 0 patterns - that doesn't mean it's better than the white ones. Sub-Stats are random unless they are predetermined by level 0 colored patterns.

Patterns base Stats and Sub-Stats :

There is 6 slots for patterns (Head, Left Arm , Right Arm , Body , Left Leg and Right Leg). Each pattern can be equipped to it's corresponded slot. Some base stats are fixed and some are random based on it's slot:
  • Head Base Stats: [ATK, ATK%, DEF, DEF%, HP , HP%, CR%, CRD%]
  • Left Arm Base Stats: [ATK, ATK%, DEF, DEF%, HP , HP%, SPD]
  • Right Arm Base Stats: [ATK, ATK%, DEF, DEF%, HP , HP%, RES% , HIT%]
  • Body Base Stats: ATK
  • Left Leg Base Stats: DEF
  • Right Leg Base Stats: HP
Sub-Stats are completely random. Highlighted base stats are unique stats can only be found in there corresponded slots or as sub-stats.

OK, now we are done with basic pattern knowledge , let's talk about how you can use this to your advantage!

Method 1 - Skill Builds:

Build your partner based on their skills. For example, some partners deal more damage based on their HP, so in this case you want to give them HP as high as you can!

Let's take Blue Nomad King as an example his passive deal more damage based on his HP so you want to give him 6 Hippos with HP % for head, left arm and right arm.

Method 2 - Partner Type:

There are 3 types of partners [ ATK , SUP , DEF ]. You can build partner based on its type:
ATK partners:
  • Crit build: 4 Badger + 2 Wolf. Focus on ATK%, CR% and HP% 
  • Or Attack build: 4 Smilodon + 2 Hippo. focus on SPD, ATK% , HP%.
SUP partners:
  • Buffer build: 4 Cat + 2 Hippo. Focus on SPD, DEF%,RES%
  • Or Debuffer build: 4 Cat + 2 Corsac. Focus on SPD, HP%, HIT%
DEF partners:
  • Pure Tank build: 6 bull. Focus on DEF%
  • or Hyper Tank : 4 bull + 2 corsac. Focus on SPD , DEF% , HIT% 
  • Never Ever give your Tank HP! It must be the lowest HP partner in your team (to entice the enemy to attack it).
Some partners have wrong types for some reason! Take Green marksman for example she is a good damage dealer but for some reason she has DEF type?

Method 3 - Team rule:

In some cases you want certain partner to act as a support and tank or damage dealer and debuffer to fill a gap in your team.

For example: Green dragon man buffs your team's SPD, while you can use him as a tank as well (4 cat + 2 bull focus on SPD, DEF %.

Try to play around your partner leader skill.

For example: Blue Mr. Dagger increases CR % by 24 % + 12 % CR from Wolf Set gives your damage dealer (Crit build) 86 % CR - that means you have a free pattern slot you can equip it with whatever you want!

TIPS:

  • Level up your patterns 3 level each time to get the sub-stats first before you level up another pattern.
  • Farm adventure at purgatory level to increase your chances of getting 5 stars patterns.
  • Removing a pattern will cost you souls so plan it carefully.
  • Level up stat % patterns first , it give your partner the highest stats he can get.
  • Don't level up 5 stars pattern beyond +9 unless you are sure it have the sub-stats you want!
  • "focus on" means try to get the base stat and sub-stats for each build, i know it's hard but keep trying :(
  • Watch your partners fights carefully and decide what you need to improve! (your damage-dealer get attacked first instead of your tank? Give him more HP! Your partner always debuffed or CC'ed? give him more RES! Your tank dies fast? give him more DEF!)
  • The previous tip doesn't mean you need to change your build, sometimes what you need is to level up corresponded pattern!

Wednesday, June 20, 2018

What is Outpost Durability in Brutal Age and can Outposts be destroyed?

Outpost Durability is presented as the first Outpost Research option in Brutal Age but there is no explanation in the game of what it is so it is very confusing for a new player.


Each Outpost has a certain amount of starting durability. This can further be increased via the above mentioned Research.


Outposts Durability & Burning

If you attack an Outpost and win the battle then the enemy Outpost will be set on fire and will burn for a certain period of time (usually it is set to 30 minutes after a successful attack).

The Outpost will then lose durability during the time when it is burning, which I believe it is 1 point per second.

When the durability of the Outpost reaches 0, the Outpost will disappear from the map!

Outpost Repair

The player can extinguish the fire to stop the durability loss and can restore durability by repairing his/her Outpost.

To do this go to:
  1. Outpost
  2. Details
  3. Repair

Outposts around the Temple in the Swamp

There is an exception to these rules. This has to do with the Outposts which are located inside the brown swamp in the area around the central Temple.

For all these Outpost there is no burning period - they are immediately destroyed if the attacker wins!

War Pattern Strategy and Tips

This is a post I found on the Brutal Age Facebook page which I want to share here as well and I will add more information over time to this post related to WAR PATTERNS.

War Pattern Tips:

  1. For War Patterns of the same star level, the Percentage stats will be better than fixed number stats
  2. Some Set Effects require four War Patterns, some only require two.
  3. You don't have to equip six War Patterns just to make the Four War Pattern Set Effects work because you can only enjoy the Set Effect only once.
  4. The best War Pattern Combinations could be 2+2+2 or 4+2. which will maximize the bonus of set effects.
  5. Please seriously consider equipping War Patterns because it requires some resources to remove them.
  6. If you want to change War Patterns, you can just equip the new War Patterns to save Souls when removing War Patterns.

War Pattern Enhance Tips:

  1. You will enjoy a greater chance to get War Patterns with high star levels while completing more difficult Explorations
  2. It's suggested to enhance 4- or 5-star War Patterns (you will need them more the more you play) to a high level instead of 1-, 2- or 3-star War Patterns.
  3. War Patterns with a high enhance level will suffer a greater failure chance, but War Patterns won't disappear if the enhance fails.
  4. When a War Pattern is enhanced to Level 3, Level 6, Level 9, Level 12, sub stats bonus or extra sub stats will appear.
  5. When a War Pattern is enhanced to Level 15, the main stats will be greatly boosted.
  6. It will cost more Souls to enhance a War Pattern with a higher enhance level and higher star level.

Partner Strategy: War Pattern Recommended for Nomad King and Colonel

War Patterns recommended for Red Nomad King:
  • Smilodon Set of 4 + Wolf Set of 2(ATK+35%⚔️,CR Rate+12%🎯)
  • 3x Wolf Set of 2(CR Rate+36%🎯)
War Patterns recommended for Blue Nomad King:
  • 3x Hippo Set of 2(HP+45%💓)
  • 2x Hippo Set of 2 + Wolf Set of 2(HP+30%💓,CR Rate+12%🎯)
War Patterns recommended for Green Nomad King:
  • Smilodon Set of 4 + Wolf Set of 2(ATK+35%⚔️,CR Rate+12%🎯)
  • 3x Wolf Set of 2(CR Rate+36%🎯)
  • Hippo Set of 2 + 2x Wolf Set of 2 (HP+15%💓,CR Rate+24%🎯)
War Pattern recommended for Red Colonel:
  • 3x Bull Set of 2(🛡️DEF+45%)
War Pattern recommended for Blue Colonel:
  • 3x Bull Set of 2(🛡️DEF+45%)
War Pattern recommended for Green Colonel:
  • 3x Bull Set of 2(🛡️DEF+45%)

War Patterns per Slot


BODY

  • Main Stats: ATK
  • Sub Stats: ATK, DEF, HP, ATK Percentage, DEF Percentage, HP Percentage, SPD, CR, CRD, Res, Hit
  • War Pattern Notice: The War Pattern equipped to "Body" will definitely have an ATK main stat. It's easier to be obtained from "Adventure". If you have obtained a high star level War Pattern of this type, you can use it. However, the sub-stats are random. You may seriously consider which Partner the War Pattern suits best (for example, DEF is suitable for Boar and Blue Berserker that needs HP).

LEFT FOOT

  • Main Stats: DEF
  • Sub Stats: ATK, DEF, HP, ATK Percentage, DEF Percentage, HP Percentage, SPD, CR, CRD, Res, Hit
  • War Pattern Notice: The War Pattern equipped to "Left Foot" will definitely have a DEF main stat. You can also use high star level War Patterns of this type. Don't forget to consider the sub-stats.

RIGHT FOOT

  • Main Stats: HP
  • Sub Stats: ATK, DEF, HP, ATK Percentage, DEF Percentage, HP Percentage, SPD, CR, CRD, Res, Hit
  • War Pattern Notice: The War Pattern equipped to "Right Foot" will definitely have an HP main stat. You can also use high star level War Patterns of this type. Don't forget to think about the sub-stats.

HEAD

  • Main Stats: CR, CRD, HP, DEF, HP, ATK Percentage, DEF Percentage, HP Percentage
  • Sub Stats: ATK, DEF, HP, ATK Percentage, DEF Percentage, HP Percentage, SPD, CR, CRD, Res, Hit
  • War Pattern Notice: The War Pattern equipped to "Head" has a random main stat. You can choose the one you want; at the same time, the main stats could be CR, CRD! If you want to make your critical strike more powerful, then the War Patterns of this type will be extremely important for you.

LEFT HAND

  • Main Stats: SPD, ATK, DEF, HP, ATK Percentage, DEF Percentage, HP Percentage
  • Sub Stats: ATK, DEF, HP, ATK Percentage, DEF Percentage, HP Percentage, SPD, CR, CRD, Res, Hit
  • War Pattern Notice: The War Pattern equipped to "Left Hand" has a random main stat. You can choose the one you want; at the same time, the main stats could be SPD. If you want to move quickly, then War Patterns of this type will be extremely important for you.

RIGHT HAND

  • Main Stats: Res, Hit, ATK, DEF, HP, ATK Percentage, DEF Percentage, HP Percentage
  • Sub Stats: ATK, DEF, HP, ATK Percentage, DEF Percentage, HP Percentage, SPD, CR, CRD, Res, Hit
  • War Pattern Notice: The War Pattern equipped to "Left Hand" has a random main stat. You so can choose the one you want; at the same time, the main stats could be Res, Hit. If you want to resist more Debuffs or higher chances to inflict Debuffs, then War Patterns of this type will be extremely important for you.